By Morgan Sprigler
The thought of sending my firstborn off to preschool in a few short weeks has me feeling all the feels. For two mornings a week, she will be in someone else’s care, learning and growing without me, making new friends and becoming her own little person (cue the ugly cry). I am equally as excited as I am terrified at the idea. For those of you with several years of sending your children off to school under your belt, I commend you.
So, for the woman who will bear the weight of schooling my toddler (who, up until this point in her life, has been the boss), we have made you a vase out of pencils. Same, Same?
 MATERIAL LIST
• Smooth, round vase
• Pencils
• Glue gun
• Glue sticks
• Ribbon
• Fabric flower
• Letter to teacher
• Envelope
• Scissors
• Floral sticks
• Floral tape
• Faux apple
• Card holder
 Step One – Glue
Choose a vase that is the same height as a pencil or a bit shorter. Begin adhering pencils around your vase with a line of hot glue, alternating the direction each time. Genevieve participated by handing the pencils to me once I laid each line of glue. Be sure that your pencils are even at the bottom to keep your vase level.
Step Two – Jazz It Up
Genevieve chose a burlap/lace ribbon and a pretty ivory fabric flower to wrap around the center of our vase (like mother, like daughter). Have fun with this part. The options are endless! Simply glue the ribbon around the center of your pencil vase and adhere your flower in the center.
Step Three – Type a Letter
The letter we composed to Genevieve’s teacher, Mrs. Jamie, will come in handy throughout the year because we gave her a little bit of homework by asking her to fill out a few questions about her favorite things. Her answers will help me surprise her with gifts of thanks during the school year. We used the same ribbon we chose for our vase to decorate the envelope, and finished off the back with a cute little button.
 Step Four – Flower Shopping Spree
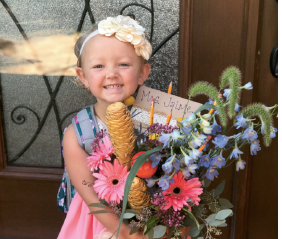
This was our favorite step of this project. We traveled to Nance’s Floral Shoppe to choose the perfect arrangement for our teacher. Mr. Brian was kind enough to allow Genevieve to select any flower she desired and even took the time to teach her how to put it all together. He was a great teacher, and Genevieve was a natural.
Step Five – Finishing Touches
Once we arrived home with our beautiful flowers, we decided to add some final touches. Using floral tape, we secured a few pencils to our floral sticks and placed them inside of our arrangement. With a Sharpie, I wrote the initials of Genevieve’s new school on the front of our faux apple and then secured it to a floral stick using hot glue before adding it to the arrangement. Finally, we placed our card inside of the card holder. Ta-da!
We hope Mrs. Jamie loves her vase as much as we loved making it. Don’t forget to tag me with photos of your creations on Instagram – I’m @ Mrs_Sprigler. Wishing everyone a happy and healthy school year!
XO
Morgan


